
Even though many applications apply their own Texel Density (TD) on mesh and UV import, doing the groundwork when you are unwrapping your model can save you a lot of time down the line, which is why RizomUV also offers this feature, and in two places in the UI:In the Layout Panel and in the Packaging Panel.
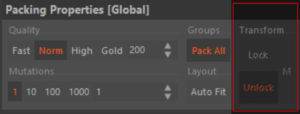
This tutorial walks you through how to set Texel Density in both panels,and the workflow applies to single tile UVs as well as UDIMs. We generally recommend turning AutoFit off in Packaging when you work with Texel Density to avoid size and scaling issues - and to lock your islands as you go when working with multiple Texel Densities.
TD Shortcut Cheatsheet
Here is a quick overview over our most common keyboard shortcuts when working with Texel Density:
Pixels vs Texels
Remember not to confuse map size with Texel Density, even though the the phrase is used interchangeably: Texels make up the smallest pieces of a texture map i.e. in a game engine. Pixels make up the smallest part of your screen, so when you talk ab i.e a 4K map, you talk about the space it will occupy on your screen, and texel density if any, is the resolution of those islands in the map.
Using the Layout Panel:
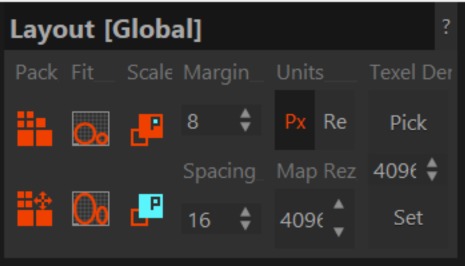
In the Layout (Global) panel, you'll find the following options: Pack-fit, which lets you define your packing layout options. Scale, which bases scale on selected or non selected islands, Margins, where you set your edge and gutters, and units, margins and TD. It’s the latter three we’ll be working with:
Before we start the rundown, it’s worth noting you can define your Texel Density (TD) at any time in your unwrapping process. Now let’s get to it:
- Start by defining your final working map size in Map Resolution. The example shows a typical 4K map-size.
- Then, decide if you want to use Pixels or Real Values. Pixels will, of course, set TD based on pixels, but it's worth noting that Re stands for Real UV units, which means that there is a 1:1 length ratio between 3D and UV space. If you are a RizomUV RS user, this value is set by default, as you may need the UV stamp as a CAD model sheet element. However, as the tutorial is created in VS, we will use Pixels as value.
- Next, define your Map Rez. As RizomUV calculates part of the TD based on the map's horizontal resolution, start by setting it to 2048
- Moving on to Texel Density, you have two options: To pick a density via the Pick tool and an island you select, and to set a precalculated value.
- Using the Pick Tool
- Picking a Texel Density: This picks and then sets a TD based on the island(s) you've currently selected. You can press Alt-Q as a shortcut to set this – just hover over a selected island and press Alt+Q.
Note that hovering over an unselected island and pressing Alt+Q will give you the average TD, not the TD of the unselected island.
- Now you've picked a value, all you need to do to apply it to other islands is to select the ones you want to have the same TD and press Shift+Q
- Picking a Texel Density: This picks and then sets a TD based on the island(s) you've currently selected. You can press Alt-Q as a shortcut to set this – just hover over a selected island and press Alt+Q.
- Set Density relies on a precalculated or pre-decided value you enter in the spinner value under Pick (although experimenting is encouraged. For a normal, square UV tile, all you need to do, is ´divide horizontal map resolution, like 1024, 2048. 4096 by its 3d horizontal tile size, typically defined in metres or centimetres - like this:
HorizontalMapResolution / HorizontalTileSize
This means that if you for example want to enter values for a 1024k tile and a one meter setup, you would calculate it as follows: TD = 1024px / 1m = 1024px/m -And for centimetres it would look like this: 1024px / 100cm = 10.24px/cm - Should you want to learn more about calculatng TD as a user, not a developer, Leonardo Iezzi has an excellent tutorial over at ArtStation
- Enter your final value into the Set spinner – and press Set. Rizom will then set your selected islands to the value you have set.
- If you have not selected any islands, Rizom will apply the TD setting to all of them.
Developer? Here's how Texel Density Calculation is done in RizomUV
As Rémi Arquier, developer of all things RizomUV puts it, Rizom UV calculates Texel Density for a square space on a square map, where the calculation is as follows:
TD = (lenUV / len3D) * (mapRezH / tileSizeH).
LenUV is the edge of a given element in UV space, Len3D is the same, only in 3D space, mapRezH is the horizontal map size, and TileSizeH is your desired horizontal tile-size .
And then the final TD is calculated like using the following example:
Suppose you have a cylinder 4 meters tall, and with a horizontal unwrap, so in UV space it has the length of 1 unit . If your horizontal map resolution is 4096, and your horizontal tile size is 1 unit, then you get TD = (1 / 4m) * (4096px / 1) = 1024 px/m , or, if you use centimetres:TD = (1 / 400cm) * (4096px / 1) = 10.24 px/cm
For a rectangular map, the formula is the same, but set a value of 2,not 1 - like this:
TD = (lenUV / len3D) * (mapRezH / tileSizeH) - and then TD will be calculated as TD = (2 / 4m) * (4096px / 2) = 1024 px/m

Texel Density in Packaging
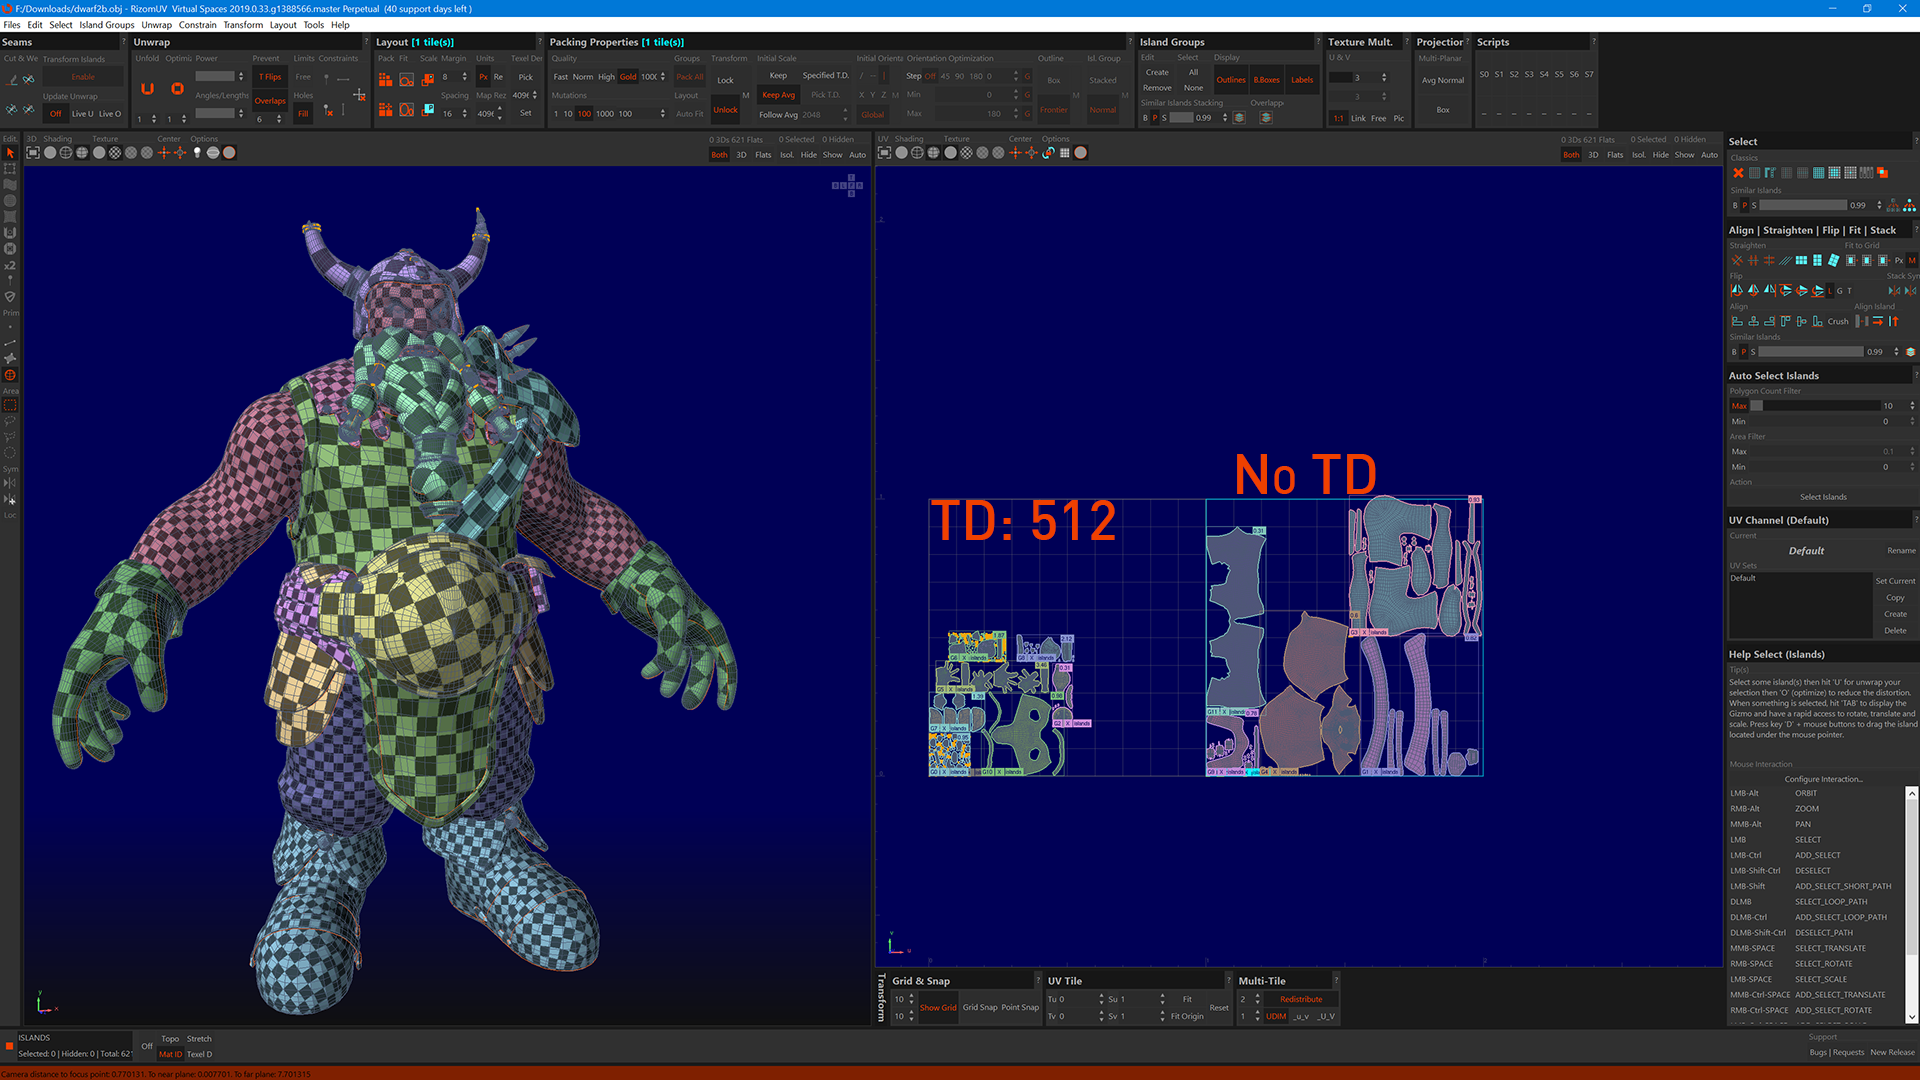
The first thing you should know is that TD in Layout and TD in Packaging are entirely independent of each other, even though they work the same. The second thing you should know is that you need to turn Autofit off, as overrides the TD settings. This means that unless you have locked your islands with custom settings, Packaging will apply TD across your entire map, UDIMs included. Here's how you set it, it is very similar to the settings in Layout, the trick is how to use them all together, which we will show in the next chapter:
- If you want a specific TD, you click the Specified TD button, which activates the spinner input value field where you can enter your custom value. You calculate this the same way as described above. But the gist is that if you, i.e. set your specified value to 256, and have no islands selected, all islands on your UV tile are going to get this value
- If you have scaled an island and want to apply the same TD across the map(s), select the island which TD you want to copy, and press Pick TD. The numbers in the spinner value field will change. Press P to pack, and Rizom will pack the islands with the same TD
Using Different Texel Density settings together:
You can, of course, set different texel densities on different groups and islands if you need. the workflow is roughly the same, on single as well as UDIM tiles. You need to remember to lock the groups you dont' want to be affected by new settings, or to select the islands you want to pack with your specific parameters. Also keep in mind locked groups or islands will always have a black outline as shown in the image above
- If you want to have a group of islands unaffected, select them, press G for Group, and press the G in the lower-left corner of the group. This means you have selected the group, not the islands Press Lock to Lock
- If you want a group or island with specific TD settings, select it, define your value, and press Set or press Shift+Q as a shortcut and Lock if needed
- If you want to use stacked groups, press Alt + G to stack them and press the G in the lower-left corner of the group. You have now selected the group, not the islands. Set your TD settings and Press Lock in Packaging to Lock, if these are the only ones with this set of TD
- If you have islands you want to have a specific TD for a set of islands you can either:
- Select the islands, and set specified TD in Layout – they will shrink or grow depending on your input. Group and Lock them
- Select the islands, select TD in Packing, enter your input, and press P to pack. Only the selected islands will pack at the specified TD. Group and pack them
- If you want to pack UDIM tile by UDIM tile, double-click the tile in the lower left where it says Tile<number>, set your TD and press P.
- Press X next to the tile number to unselect, and move on to the next tile
- You can also use Set for this – just select the tile(s) and pick or set specified TD. You need to have Specified TD and autofit turned off in Packing, and have Keep or Keep Average set instead before you hit P
A few words about locking
One of the most common questions we get in the RizomUV Discord channel, is how to lock unwrapped items.
- First of all, you should be aware you can lock islands, multiple islands, groups, and UV tiles (when i.e using UDIMs). You cannot lock edges or verts,they will need pinning instead.
You lock your islands and groups by pressing Lock in the Packaging Menu. - Next - to make sure your locked items behave, DISABLE AUTOSAVE
- You should be aware of the subtle difference between locking a grouped set of islands, and a group - you can lock them two ways:
- Group islands by selecting your islands, pressing G to Group, and then clicking Lock in the Packaging menu. This will lock the islands in the group.
- To lock the group itself, you need to zoom in on the lower left corner of the group. You then click the G<number> on the far left. This will select the group, not the islands in the group. Press Lock, and press X to exit. The group will now have a black frame denoting it's locked.
- You can lock a UV tile by zooming in on the lower left of the tile, pressing tile <number>, pressing Lock, and X to exit. As with locked groups, the tile will have a black edge around it, denoting it's locked.
- Knowing how to lock, and what, will make it easier for you to work with multiple TDs in your UVs