
1Did you know you can calculate your islands’ internal overlaps or rather, the lack thereof, based on your map size? And the math is easy: Take the map size you have defined in Layout, I.e. 4096 and divide it by spacing - i.e. 32 pixels for a 4K map. Divide by 1000 – that will give you the entry of 0.128 to enter into the Overlap spinner in the Unwrap panel and your overlap avoidance will be defined in proportion to your map. You can even enter the whole division in the spinner field -I.e. (4096/32) ) / 1000. I know it’s easy to just crank up the value to 100 and have it done with, but if you set that amount of power, you may get balloon-shaped islands. Much better to have it honed down to suit your map.
2Did you know you can select similar symmetric islands with the CTRL + M key combination? First you need to define the settings, though: In the Island Group or the Align/Straighten/Flip menu, go to Similar Islands and press the S button next to the slider. Now RizomUV will only select the symetric similar islands. Remember to set it back to B to select any island (straight or symmetric), and P to select only straight-similar islands.
3Did you know that Polygon Select’s Magic Wand is one of RizomUVs hidden heroes? Here’s how you use it: Hit F3 to enter Polygon Select mode. The Magic Wand will display on the right. By activating or deactivating Deviation and Edge, and tweaking the sliders, you can select anything from single polygons at an angle, to entire shapes or shells. When selecting, it will be white. Click on your final selection, and it will be blue. Press C to cut. You can also use the mouse-wheel + ALT or SHIFT combination to modify the slider’s values.
4Did you know that using horizontal or vertical constraints in the Unwrap menu doesn’t necessarily need a new unwrap? You can get excellent results by using the Optimise function (O) or the Optimise brush (F7)
5Did you know that you can predefine your island rotation before packing? In the Packing Properties, you will see something called Initial Orientation on the right hand of the panel. The easiest way to use this is to press the buttons: / is the default rotation off, – presets it to horizontal, and | predefines it vertically. This will save you orienting the islands by hand or group post unwrap. Also, explore using axis or just rotation values in step. You can use this on entire models, or just select islands for a super tidy and aligned layout,
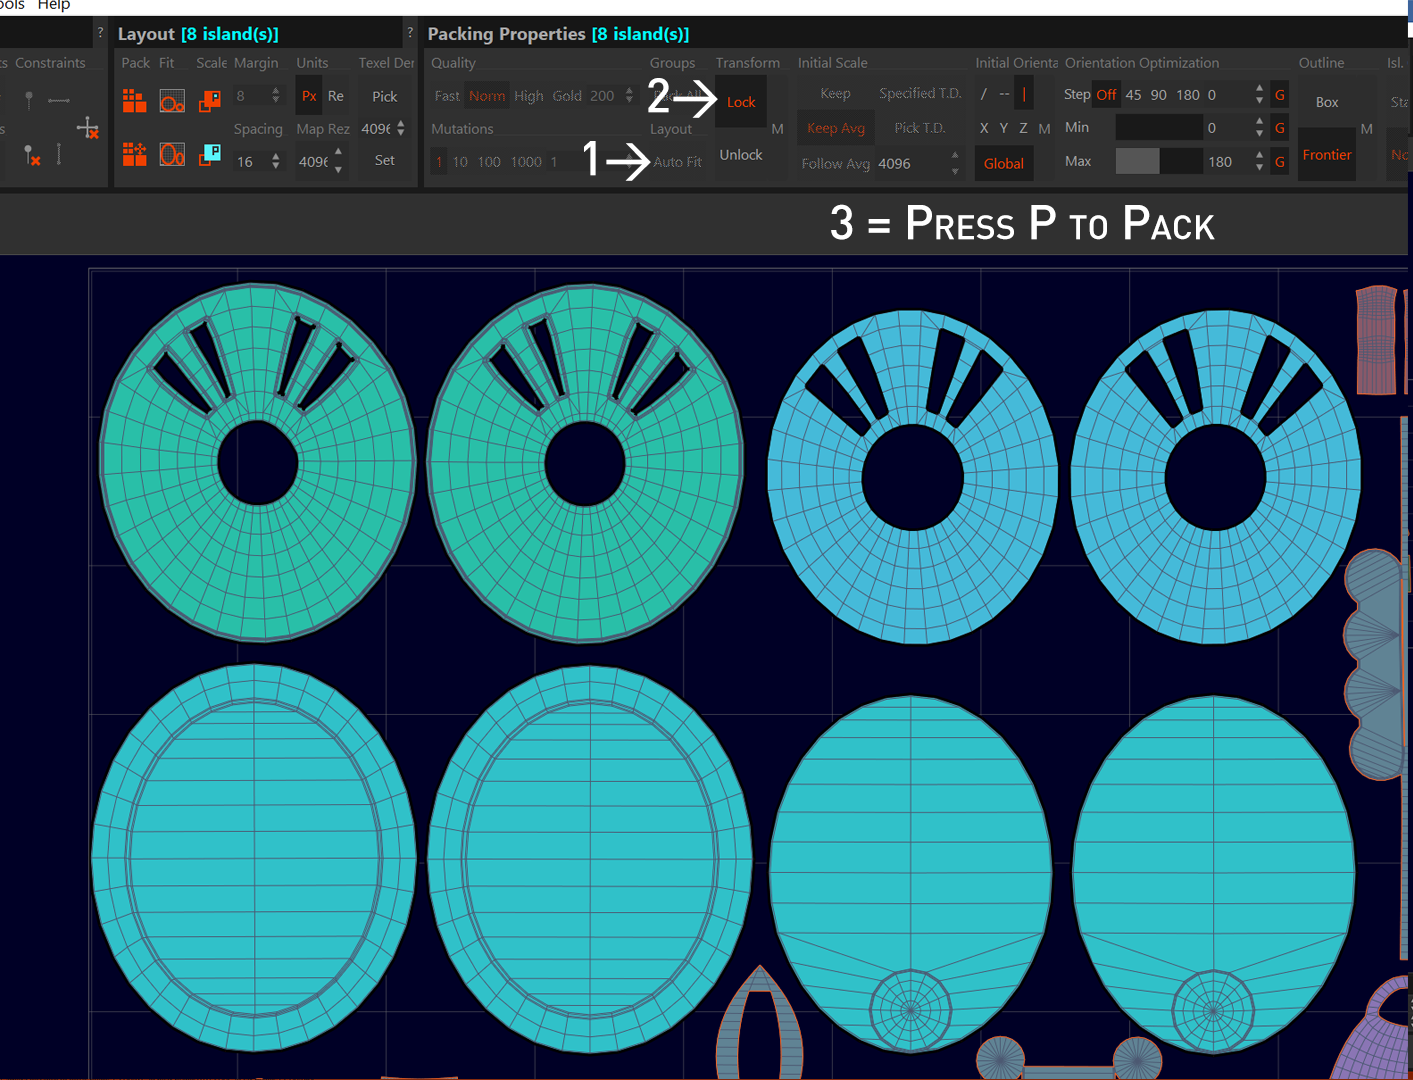
6Did you know it’s easy to lock your islands for packing? Unselect Autofit, select your islands, and press Lock in the Packing Properties. This will prevent them from being moved, scaled or rotated.
7Did you know that If you want to set a specific texel density, you need to first set your horizontal map resolution (Map Rez) in the Layout panel? Then, in the Packing Properties, disable AutoFit, and set the initial scale mode to "Specified T.D". Next, specify the texel density value you want to use. Press pack. The islands will be rescaled to match the specified density. If you just want to rescale a specific island to a specific texel density, set the Texel Density value in the Layout panel, select your island, and press the Set-button in the Layout panel.
8Did you know you can paint attraction (F8), pin (F9) and density maps (F10) in RizomUV? If you don’t use the hotkeys, you can find them in the tool panel on the left under the Unfold and Optimise brushes. Make sure the Colour Map Slider at the bottom of the screen is set to ON so you can see what you’re doing, and remember to set your custom brush settings in the Tool options panel in the top right.
9Did you know that the AutoSeam function is the easiest way to unwrap hard edge models? Enter Edge Mode and the AutoSeam Panel will come up on the right. Press Select Sharp Edges. Use the slider to define your number of cuts, and make sure you explore the Advanced options, which let you reduce island count by rewelding edges, without overlaps, as well as defining stretch control and size limiters.
10
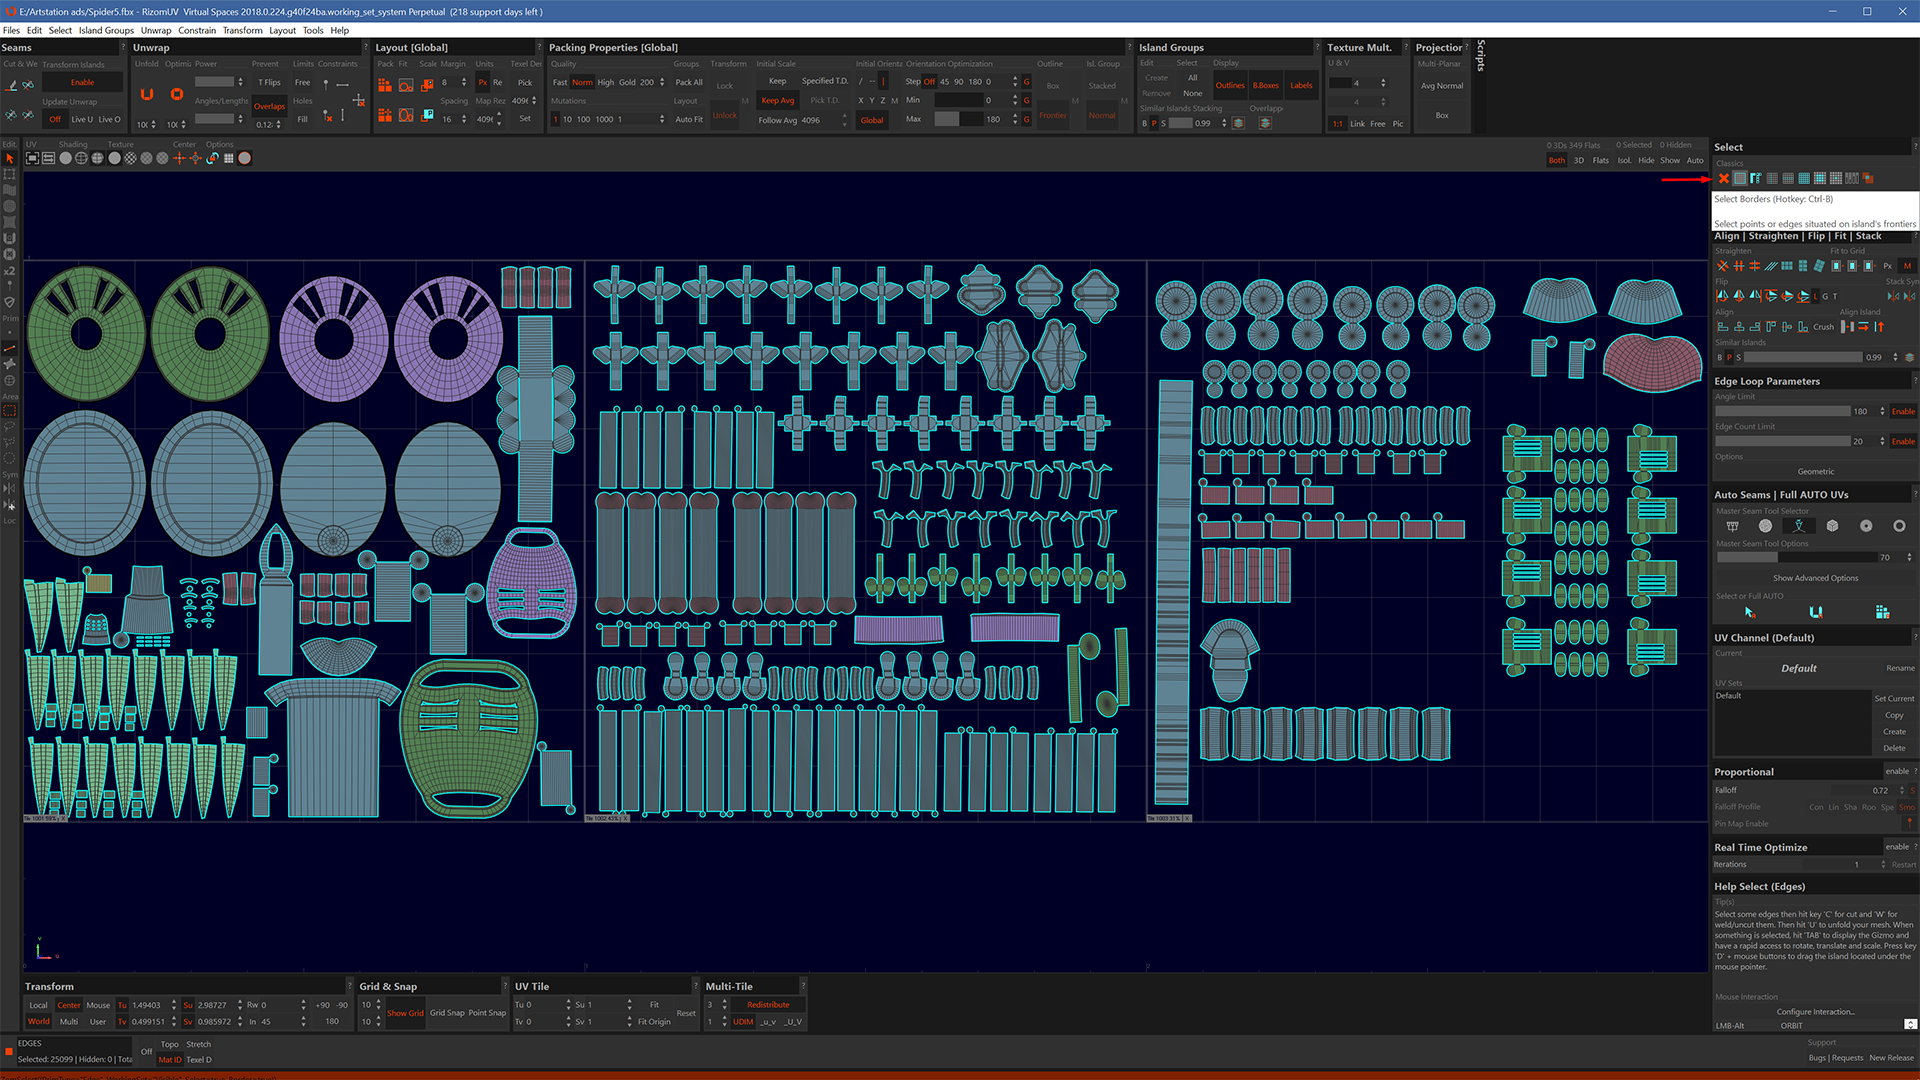
Did you know that Select can make your life a lot easier? Located on top of the settings panel on the right, you can do anything from selecting by borders, loops and selection growing, as well as the super handy converting a polygon selection to edge selection, as well as selecting overlaps.